

Basically What is Masonry? – WooCommerce products masonry grid
Masonry is a JavaScript grid layout library. It works by placing elements/divs in optimal position based on available vertical space, sort of like a mason fitting stones in a wall. You’ve probably seen it in use all over the Internet (Example: Pinterest).
Convert your boring Post Design into an impressive Masonry layout. You don’t need to buy an expensive Masonry theme to get Masonry layout anymore.
In this article, we are going to show how to make masonry layout for WooCommerce products in a WordPress site. Here I’m using masonry java scripts from masonry.desandro.
Let’s get started :
By default, WooCommerce will provide this kind of layout.

Step 1 :
Upload the Masonry scripts and CSS files to your website in a folder. By downloading from here
By clicking here you can download the Woocommerce plugin with masonry
Ex:- In your active theme directory create a folder called Masonry and upload the CSS and JS scripts to that folder. There are 5 javascript files and 2 CSS files are required for this masonry layout.
Step 2: Now we have to edit the WooCommerce Plugin :
Goto: wp-contents/plugins/woocommerce/templates/loop/loop-start.php and do following changes below.

In the above image, I have added 2 stylesheets and 1 masonry javascript and I have changed the class name and id of the product loop <ul> as class name = grid effect-2 and id = grid.
<link rel="stylesheet" type="text/css" href="http://yoursite.com/wp-content/themes/flash/masonry/default.css" />
<link rel="stylesheet" type="text/css" href="http://yoursite.com/wp-content/themes/flash/masonry/component.css" />
<script src="http://yoursite.com/wp-content/themes/flash/masonry/modernizr.custom.js"></script>
<br><br>
<ul class="grid effect-2" id="grid">
In the above code add the URL according to your website and the path of the masonry script, In the other words we have located Masonry Script in the above path(Inside the flash theme)
Step 3: Customizing loop-end.php in the same directory
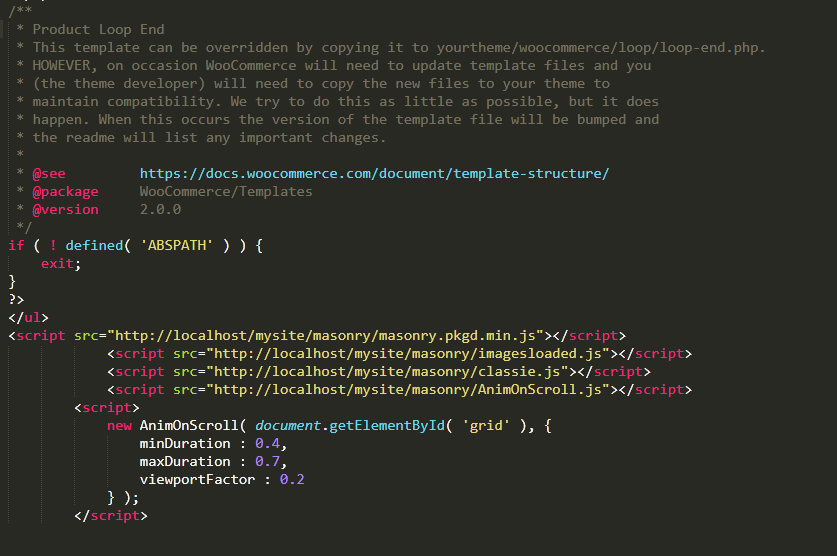
<script src="http://yoursite.com/wp-content/themes/flash/masonry/masonry.pkgd.min.js"></script>
			<script src="http://yoursite.com/wp-content/themes/flash/masonry/imagesloaded.js"></script>
			<script src="http://yoursite.com/wp-content/themes/flash/masonry/classie.js"></script>
			<script src="http://yoursite.com/wp-content/themes/flash/masonry/AnimOnScroll.js"></script>
		<script>
			new AnimOnScroll( document.getElementById( 'grid' ), {
				minDuration : 0.4,
				maxDuration : 0.7,
				viewportFactor : 0.2
			} );
		</script>
At the end of </ul> Paste the scripts which are required. as shown in the above figure.
Masonry needs to calculate the size of each of the items/Grids on the page in order to get layout dynamically. A problem I’ve run into with Masonry in many browsers is that it will miscalculate the height of the items with slow loading of images, it leads to overlapping of items. The solution is to use images loaded to prevent Masonry from calculating the layout until all images are loaded. This ensures proper sizing of the items.
Step 4: Last but not least :
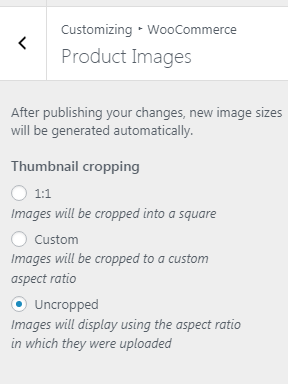
Goto Appearance -> Customize -> WooCommerce and check Thumbnail Cropping as Uncropped as in the above image. That’s All. Now it’s time to see the Results.
Here :
In this way, you can make your WooCommerce masonry layout for Products in WordPress in a simple and easy way.
Note :
- Once you have done with all the above steps don’t update the plugin to stop plugin update click here, If you want to update your plugin the layouts will going to be as the standard layout of Woocommerce. So check the changelog before updating the plugin.
- In the WooCommerce products, masonry Grid width is fixed, only height will vary as per the masonry javascript. If you want to edit the columns just goto components.css file where you can find all the CSS parts.
Masonry script files Download Link :
Woocommerce Plugin (Version 5.6.0) with Masonry Download Link :


Hi,
is this overwritten if I update the plugin?
Hi Vincenz,
This is one of the tricky method, in this case, you can’t do plugin updates. if you did update to plugin it will erase all your masonry scripts.
Hello Vishwas I think that if you copy the woo commerce template inside your template directory with the right folder structure, you will be able to add your own customize parts of woo-commerce, it works almost like a child theme it should be the same concept that is used on commerce page customization, in that way you wont loose all the work in the next updates, Please tell me if i am wrong?
Hi Krixt, Anything you can use as per your requirement. this is a trick where you can make masonry in woocommerce
Hi, I have implemented this solution, but it is just creating one column to the right of the screen rather then a masonry affect?
Any help would be much appreciated. The website is http://www.camillebarr.com thank you!
Please check the Script URL and CSS URL. as we have noticed that “https://www.camillebarr.com/wp-content/themes/flash/masonry/default.css” this URL is going to 404 page. (if you open this “default.css” styles should appear)
Please place the scripts, CSS and try again.
Can it be made with 4 columns?
yes, it can be done.
When I implement this, it includes a list of tags and other junk under the images. Any way to get rid of that?
Hi Elsie,
Follow the Step 4 Guildline!!!
WoOw, thank you
I activated on Last verstion of woocommerce now